|
|
Online Help |
| Help Table of Contents |
Customizing Content with Constituent Profile Data
(Website Administrator only)
Customizing your site with a constituent's personal information from their Constituent360 record, provides a more sophisticated user experience. For example, after logging in, a constituent can be greeted by the message, "Welcome (first name)". You can also display a request for a donation, or a thank you message depending on the constituent's donation amount. Or you can customize site content depending on the user's center or group membership, and so on.
Before you publish the page, it is helpful to preview and test the content using different preview users.
The Personalization Tool vs. CMS Template Language
Although the personalization tool is simpler to use, it has less functionality than CMS Template Language. The personalization tool is only available in the Visual Editor, whereas template language is also available in the wrapper editor. In addition, template language is not limited to basic biographical, membership, and donation information. It can also be used to add complex personalized content (such as lists of interests), and conditional content.
Add Constituent360 profile data using:
Using the Personalization Tool
You can add constituent biographical data in the Visual Editor using the personalization tool. It's a good idea to preview and test the content before publishing.
To use the personalization tool
- Open a page in the Visual Editor.
- In the Visual Editor toolbar,
click the Insert Personalization
 button. The Insert Personalization dialog displays.
- Select a category from the Type column, and a type from the Field column (such as Biographical > User Name).
- If necessary, in the
Text to Display field, enter alternate text to display if the
Constituent360 field is empty. For example, you can enter the word "friend"
as an alternative to user name in the case of "Dear (user name)".
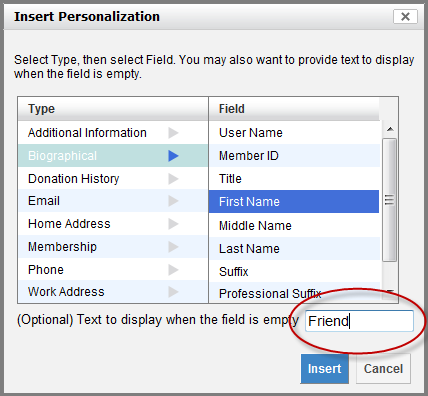
- Click Insert. The personalized field
displays in the Visual Editor.

To test the personalized fields
Note: Although anyone can use
different preview users, only WSA's can define the preview users in
Reports and Tools.
- Open the page in the Preview tab.
- In the Preview Content As field, select a preview user. The conditional content displays for the selected preview user.